Easy, healthy recipes for the busy cook with lots of time saving tips and suggestions for preparing meals in advance. Cook once and prepare several meals. Also included are ideas to help you set up a working pantry so you will cut down on trips to the store and save money as well.
Tuesday, August 29, 2017
More zucchini! Zucchini banana bread this time.
If you follow my blog, or know me well, you know that I rarely make a recipe exactly as it's written. I always have to mess with it. Leave something out, add something. Sometimes I don't even use a recipe, I just throw things together using instinct. However, the one thing I usually never mess with is baking. I usually follow the directions exactly, especially when it comes to things like leavening, and liquid amounts. Today I threw caution to the wind. I found this very large zucchini lurking under a leaf in my garden. It was approaching baseball bat size. The only thing zucchini that big are good for is zucchini bread. I cut it up, took out the seeds, grated it and still ended up with seven cups of zucchini. So now, while I'm fussing around in the kitchen, I also find a banana that is past its prime. Hey, why not combine the zucchini and banana? How bad can this be? But as I look up my recipe, I realize that the banana will add lots more moisture to the mix, so I start experimenting. Here is what I came up with.
2 cups all purpose flour
2 eggs
1 ripe banana mashed
2 cups grated zucchini
1/2 cup oil ( I used coconut, but vegetable oil is fine)
1/2 cup white sugar
1/2 cup brown sugar
1 teaspoon baking soda
1 teaspoon baking powder
3/4 teaspoon salt
2 teaspoons ground cinnamon
1/2 teaspoon alspice
1 cup chopped walnuts
Preheat oven to 350 degrees and prepare a 9" by 5" loaf pan. I spray the pan with cooking spray, then layer with parchment that hangs over the edge. I then spray the parchment.
Combine all dry ingredients in a large bowl. Since I used my food processor to grate the zucchini, I used it to combine my wet ingredients. I transferred the grated zucchini to another bowl and added the egg, banana, oil and sugars to the food processor. After a few pulses, I added this mixture to the dry ingredients and folded them together. I then added the zucchini and nuts and mixed thoroughly.
Pour into loaf pan and bang on the counter a few times to release any air bubbles. Bake in the center of the oven for one hour or until a toothpick comes out clean. Let cool on a rack for 10 minutes before removing from the pan. Then continue to cool before slicing or it will crumble when you slice it. Enjoy! Everyone loved this and I'm sure you will too!
Please feel free to share this recipe, and the whole blog for that matter, with your friends. Leave questions and comments in the comment section below the post.
Happy Cooking!
Carol
a.k.a.
Nonnie
Monday, August 7, 2017
What to do with all that zucchini! Part 1
Every spring I plant a small vegetable garden around the outside of my condo. I'm lucky I live in a corner unit and have lots of space to plant. I do raised beds all around the foundation of the condo on the side and back. Every year I plant zucchini and every year I am disappointed because the cabbage moths take over and lay their eggs on the leaves, then the larvae get inside the stems and leaves and eat everything. Hence, no zucchini. When I lived in New Hampshire I always had more zucchini than I knew what to do with. I even wrote an article for our wive's club newspaper with a bunch of zucchini recipes. Sadly, I no longer have the paper or the recipes. Well this year is different! I have zucchini! Lots of it! So today I am playing with my zucchini and seeing how many recipes I can come up with.
I'm starting off with zucchini pancakes.
1 large zucchini about 4 cups grated
1 teaspoon salt
1 small onion chopped (about 1/2 cup)
3 cloves garlic run through a garlic press
3 Tablespoons fresh basil leaves finely chopped
1.2 teaspoon freshly ground pepper
1/2 cup grated parmesan cheese
1/2 cup Bisquick
2 eggs beaten
3 tablespoons of olive oil.
Scrub zucchini to get off any prickly things and trim off the ends. I grate mine in the food processor, but you can certainly use a box grater. You will need about 4 cups. Add 1 teaspoon of salt to the zucchini and mix well. Put the zucchini in a strainer over a bowl and let sit for about 10 minutes.
While zucchini is draining, chop the onion, basil and run garlic through a garlic press. Now take the zucchini and place in a clean dish towel. Wrap the towel tightly around the zucchini and squeeze. I got almost a cup of liquid from mine. The drier you can get your zucchini, the better your pancakes will be.
Put zucchini, onion, garlic, pepper and basil in a bowl and mix well. Add eggs, Bisquick, and cheese and mix well. In a skillet, heat olive oil over medium high heat until shimmering. Add large rounded tablespoon fulls of the zucchini mixture to the oil and pat down. Cook for about 2 - 3 minutes. Turn and cook on the remaining side for the same amount of time. I found it easier to cook them in small batches rather than put too many in the pan and run the risk of the oil dropping in temperature.
These can be made ahead and reheated in the oven for a few minutes. I ate mine for lunch, but they would make a great side dish. Enjoy!
Please share this recipe and blog with friends and family and please leave questions and comments in the comments section at the bottom of this post.
Happy Cooking!
Carol
a.k.a.
Nonnie
I'm starting off with zucchini pancakes.
1 large zucchini about 4 cups grated
1 teaspoon salt
1 small onion chopped (about 1/2 cup)
3 cloves garlic run through a garlic press
3 Tablespoons fresh basil leaves finely chopped
1.2 teaspoon freshly ground pepper
1/2 cup grated parmesan cheese
1/2 cup Bisquick
2 eggs beaten
3 tablespoons of olive oil.
Scrub zucchini to get off any prickly things and trim off the ends. I grate mine in the food processor, but you can certainly use a box grater. You will need about 4 cups. Add 1 teaspoon of salt to the zucchini and mix well. Put the zucchini in a strainer over a bowl and let sit for about 10 minutes.
While zucchini is draining, chop the onion, basil and run garlic through a garlic press. Now take the zucchini and place in a clean dish towel. Wrap the towel tightly around the zucchini and squeeze. I got almost a cup of liquid from mine. The drier you can get your zucchini, the better your pancakes will be.
Put zucchini, onion, garlic, pepper and basil in a bowl and mix well. Add eggs, Bisquick, and cheese and mix well. In a skillet, heat olive oil over medium high heat until shimmering. Add large rounded tablespoon fulls of the zucchini mixture to the oil and pat down. Cook for about 2 - 3 minutes. Turn and cook on the remaining side for the same amount of time. I found it easier to cook them in small batches rather than put too many in the pan and run the risk of the oil dropping in temperature.
These can be made ahead and reheated in the oven for a few minutes. I ate mine for lunch, but they would make a great side dish. Enjoy!
Please share this recipe and blog with friends and family and please leave questions and comments in the comments section at the bottom of this post.
Happy Cooking!
Carol
a.k.a.
Nonnie
Wednesday, July 5, 2017
Boursin chicken
I discovered Boursin cheese spread back in the late 1970's. When we had dinner parties, we would serve it on crackers with cocktails before dinner. When was the last time I served cocktails before dinner? For that matter, when was the last time I had a "dinner party"? That was a whole different life I had back then! Several years ago a friend at work mentioned that she had tried this recipe with Boursin spread stuffed in chicken breasts. She never actually gave me the recipe, but just kind of told me how she make it. I fooled around with it for a few years before I finally wrote the recipe down. Usually when I make this, I finish cooking the chicken in the oven while I made the sauce. I avoid turning my oven on in the summer, so tonight I tried finishing it on the stove. It's just as good and uses one less pan! You can easily find Boursin spread in your grocery store. It comes in a little white box with green lettering. It's usually near the specialty cheeses, like the brie and goat cheese. It now comes in several different flavors, but I still use the original garlic and herb version.
4 very thinly sliced chicken breasts
1 pkg boursin cheese spread
1 cup flour
1 teaspoon salt
1/2 teaspoon pepper
2 Tablespoons butter
2 Tablespoons olive oil
1/2 cup white wine
2 cups chicken broth
1 teaspoon dried parsley
1/4 teaspoon dried rosemary
Pound chicken breasts very thin. I usually put them in a zipper bag to do this, but don't close it or it will pop. Dry chicken with paper towels. Open the cheese and cut in half. Cut one half into four portions. Put a portion of cheese onto each chicken breast and roll the breast around it. Fasten with a toothpick. I used several toothpicks to keep the ends shut. Put butter and olive oil into a large skillet over medium high heat. Put flour, salt and pepper into a shallow dish and mix to combine. Coat the chicken in the flour and shake off excess. Place chicken in the skillet and cook for about three minutes on each side until nicely browned. Some of the cheese might leak out, but that's okay, it will just get incorporated into the sauce. Remove the chicken to a separate plate. It is not cooked all the way through at this point.
Now add three tablespoons of the dredging flour to the skillet and cook for two minutes, whisking to combine. Add the wine to the skillet and whisk while getting up all the browned bits on the bottom of the pan. Add about one cup of the chicken broth whisk and cook for two to three minutes on medium high until sauce thickens. If at any point the sauce seems too thick add a bit more chicken broth. Return the chicken to the pan, cover and cook over low heat for about ten minutes, turning once. Check the temperature of the chicken with an instant read thermometer, it should be 165 degrees. Now remove the chicken to a platter and cover with foil.
Now add the remaining cheese spread to the pan and whisk until fully incorporated. Add rosemary and parsley. Check seasoning and add salt and pepper if needed. If sauce becomes too thick add more chicken broth. Pour sauce over chicken and serve. I made this with buttered noodles and fresh green beans. Enjoy!
Please leave any questions or comments in the "comments" section below this post, and please share with your friends! Thanks!
Happy cooking!
Carol
a.k.a. Nonnie
4 very thinly sliced chicken breasts
1 pkg boursin cheese spread
1 cup flour
1 teaspoon salt
1/2 teaspoon pepper
2 Tablespoons butter
2 Tablespoons olive oil
1/2 cup white wine
2 cups chicken broth
1 teaspoon dried parsley
1/4 teaspoon dried rosemary
Pound chicken breasts very thin. I usually put them in a zipper bag to do this, but don't close it or it will pop. Dry chicken with paper towels. Open the cheese and cut in half. Cut one half into four portions. Put a portion of cheese onto each chicken breast and roll the breast around it. Fasten with a toothpick. I used several toothpicks to keep the ends shut. Put butter and olive oil into a large skillet over medium high heat. Put flour, salt and pepper into a shallow dish and mix to combine. Coat the chicken in the flour and shake off excess. Place chicken in the skillet and cook for about three minutes on each side until nicely browned. Some of the cheese might leak out, but that's okay, it will just get incorporated into the sauce. Remove the chicken to a separate plate. It is not cooked all the way through at this point.
Now add three tablespoons of the dredging flour to the skillet and cook for two minutes, whisking to combine. Add the wine to the skillet and whisk while getting up all the browned bits on the bottom of the pan. Add about one cup of the chicken broth whisk and cook for two to three minutes on medium high until sauce thickens. If at any point the sauce seems too thick add a bit more chicken broth. Return the chicken to the pan, cover and cook over low heat for about ten minutes, turning once. Check the temperature of the chicken with an instant read thermometer, it should be 165 degrees. Now remove the chicken to a platter and cover with foil.
Now add the remaining cheese spread to the pan and whisk until fully incorporated. Add rosemary and parsley. Check seasoning and add salt and pepper if needed. If sauce becomes too thick add more chicken broth. Pour sauce over chicken and serve. I made this with buttered noodles and fresh green beans. Enjoy!
Please leave any questions or comments in the "comments" section below this post, and please share with your friends! Thanks!
Happy cooking!
Carol
a.k.a. Nonnie
Wednesday, June 21, 2017
Oriental Chicken Salad - A refreshing meal for a summer evening
This was a salad I used to order at Nordstrom's restaurant. I often duplicated it at home using bottled Asian sesame dressing. I haven't made this in a long time and decided to make it tonight, but I didn't have any bottled dressing, so I concocted my own version. Everyone liked it and it's all natural, no preservatives or additives. No more bottled dressing for me!
This is one of those salads that you could throw almost anything into. Tonight I used lettuce from my garden, but it's also great with spinach. I'll give you the list of ingredients I used, but feel free to change it up. I grilled boneless chicken breasts marinated in some of the dressing, but you could certainly purchase a rotisserie chicken, shred it and use that.
Sesame Dressing
1/2 cup olive oil
1/2 cup soy sauce
1/4 cup rice wine vinegar (I'm sure you could substitute white wine vinegar or something similar)
1/4 cup honey
3 Tablespoons sesame oil
1 Tablespoon grated fresh ginger
4 large cloves of garlic, run through a garlic press
Combine all ingredients in a blender ( I actually used my Nutribullet) blend for a few seconds.
Set aside half of the dressing for the salad and use the remainder to marinate 2 large boneless chicken breasts. Marinate for about one hour. I grilled my chicken, but feel free to bake or cook on the stovetop.
Salad:
Romaine lettuce, spinach, leaf lettuce or any combination of thereof
2 - 3 carrots Cut into matchsticks. I actually used a peeler that cuts them into skinny strips.
1 cucumber seeded and cut into matchsticks
1 - 2 cups fresh snow peas
1 can mandarin orange sections drained
1/2 cup sliced almonds
Chow mein noodles
Thinly slice the cooked chicken breasts against the grain. Combine salad ingredients. I served the chicken in a separate plate from the salad, but you could certainly combine them. Top with dressing and chow mein noodles. Enjoy!
Please feel free to leave questions or comments in the "Comments" section below this post, and please share with your friends!
Happy Cooking,
Carol
a.k.a Nonnie
This is one of those salads that you could throw almost anything into. Tonight I used lettuce from my garden, but it's also great with spinach. I'll give you the list of ingredients I used, but feel free to change it up. I grilled boneless chicken breasts marinated in some of the dressing, but you could certainly purchase a rotisserie chicken, shred it and use that.
Sesame Dressing
1/2 cup olive oil
1/2 cup soy sauce
1/4 cup rice wine vinegar (I'm sure you could substitute white wine vinegar or something similar)
1/4 cup honey
3 Tablespoons sesame oil
1 Tablespoon grated fresh ginger
4 large cloves of garlic, run through a garlic press
Combine all ingredients in a blender ( I actually used my Nutribullet) blend for a few seconds.
Set aside half of the dressing for the salad and use the remainder to marinate 2 large boneless chicken breasts. Marinate for about one hour. I grilled my chicken, but feel free to bake or cook on the stovetop.
Salad:
Romaine lettuce, spinach, leaf lettuce or any combination of thereof
2 - 3 carrots Cut into matchsticks. I actually used a peeler that cuts them into skinny strips.
1 cucumber seeded and cut into matchsticks
1 - 2 cups fresh snow peas
1 can mandarin orange sections drained
1/2 cup sliced almonds
Chow mein noodles
Thinly slice the cooked chicken breasts against the grain. Combine salad ingredients. I served the chicken in a separate plate from the salad, but you could certainly combine them. Top with dressing and chow mein noodles. Enjoy!
Please feel free to leave questions or comments in the "Comments" section below this post, and please share with your friends!
Happy Cooking,
Carol
a.k.a Nonnie
Sunday, April 23, 2017
Pot-stickers! Out of this world!
I'm finally back! I have had a rough year, but I won't bore you with all the details. Just know that I am finally up to speed again and you will be hearing from me more often as I have quite a few new recipes to share with you.
So, I am one of those people who can't sleep at night. Sometimes, when I wake up in the middle of the night and can't get back to sleep, I turn on the Cooking Channel and watch old episodes of one of my favorite shows, "Good Eats" with Alton Brown. The other night he did a series of episodes on Asian cooking, and one of them was about wonton wrappers. He used them in quite a few recipes, but the only one that I really remember was pot-stickers. It might be because we all love pot-stickers. In fact we usually buy the frozen ones and eat them as a snack, but after watching Alton Brown, I figured, how hard could this be? The only problem, was that I hated the ingredients he used. Along with the pork, ginger, soy sauce and scallions, he put in things like catsup and mustard! Really? How does that go in a pot-sticker? Convinced that there had to be a better way, I searched the internet and found dozens of recipes. I took what I liked from each of them and came up with my own version. I guess it was a success, because everyone loved them!
Now, I must be brutally honest here. This is not a quick week-night meal. While the process is not at all difficult, it is very time consuming. I made about 80 pot-stickers and found it took me about 40 seconds to make each one. That was before cooking them, so you do the math.
Most of the recipes I read suggested making a large batch and before cooking, freezing them on a sheet pan and them and then transferring them to another container. This would be a good idea, but my whole family was here tonight and I knew I had to cook all of them. I actually had most of the ingredients here, but I was out of fresh ginger and needed to get scallions along with the wonton wrappers. Some of the recipes called for napa cabbage and some for regular cabbage. Since I already had regular cabbage in my fridge, I used that. Wonton wrappers are found in your local grocery store and are usually in the produce section near the tofu. One more thing, you will need to cook these in a skillet with a tight fitting lid. Do not use one of those super copper non stick pans, they won't cook properly. Pot-stickers got their name because they need to stick to the pot! Are you ready?
2 cups finely chopped cabbage (2 cups is about 1/4 of a small head of cabbage)
3/4 teaspoon salt
3/4 to 1 lb. of ground pork
a 1 inch piece of fresh ginger grated. Do not substitute ground ginger!
1 small carrot grated
3 scallions finely sliced, both white and green parts
3 cloves of garlic finely chopped or run through a garlic press
2 tablespoons soy sauce
1 teaspoon honey
1 tablespoon sesame oil
1 small egg beaten (if your eggs are extra large, use only half)
1 quart chicken broth
1 package won-ton wrappers (I used a package and a half and a whole pound of pork)
vegetable oil for frying
Begin by making sure the cabbage is finely chopped. Put in a bowl and sprinkle with the salt. Allow this to sit for 30 minutes. In another bowl whisk together the soy sauce, honey, sesame oil and egg. Add the pork, carrot and scallions and mix. After the cabbage has sat for thirty minutes, transfer it to a clean tea towel, twist and squeeze out all of the liquid. Squeeze really hard! Add the cabbage to the meat mixture and mix the whole thing with your hands like you are making meatloaf. Now comes the fun part.
Before you begin assembling the pot stickers cover a sheet pan with a piece of parchment paper. Dampen a tea towel. You will need to keep your pot-stickers covered with the towel until you cook them so they don't dry out. Place another damp towel over the wonton wrappers; you don't want those to dry out either! Also, place a small bowl of water in your work area so you can dip your fingers to dampen the edges of the wonton to seal.
Now place a small amount of filling at one corner of the wonton wrapper. Dip your finger into the water and moisten the two opposite sides.

Fold the wrapper over the filling and seal. Now make two pleats on each side of the triangle. Place under your damp towel and continue until all the wrappers or filling has been used up.

Now add a tablespoon or two of oil to your skillet and heat over medium high heat. Place about ten pot-stickers in the skillet. Do not touch them! There is no need to flip them over. Let them cook for two minutes - I actually set my timer. While they are cooking, pour 1/2 cup of chicken broth into a measuring cup with a pour spout. When they have cooked for two minutes, reduce the heat to low, pour the broth into the pan and cover. Cook for another 2 -3 minutes. Remove lid. You will see the pot-stickers deflate and become all wrinkly. That's what we want! Remove to a plate. Pour out excess chicken broth and repeat the process. Turning the heat to medium high when you first place them in the pan and reducing it to low when you add the broth.
You will probably not use the whole quart of chicken broth. I only had to add oil every two or three batches, but each time I added oil, I used a paper towel to wipe out the pan first.
I made these early in the afternoon. When it was time for dinner, I placed a steamer basket over a pan of boiling water and steamed them in batches for a few minutes to reheat them.
You can serve with soy sauce or make the following dipping sauce. This was a little spicy, so if that's not your thing, leave out the red pepper flakes.
To a small bowl, add:
1/2 cup soy sauce
1 teaspoon sesame oil
1 teaspoon rice wine vinegar
3 cloves of garlic grated or run through a garlic press
1 teaspoon of honey
1/4 teaspoon red pepper flakes.
Mix well and serve with the warm pot-stickers. I served this with Mongolian beef and broccoli, but that's a recipe for another day!
I hope you find the time to try these. It was really rewarding to see that I could make something so professional!
Feel free to leave questions or comments in the comments section below this post. I promise I will get back to you as quickly as possible. Let me know if you tried them, and how you liked them!
Happy cooking!
Carol
a.k.a. Nonnie
So, I am one of those people who can't sleep at night. Sometimes, when I wake up in the middle of the night and can't get back to sleep, I turn on the Cooking Channel and watch old episodes of one of my favorite shows, "Good Eats" with Alton Brown. The other night he did a series of episodes on Asian cooking, and one of them was about wonton wrappers. He used them in quite a few recipes, but the only one that I really remember was pot-stickers. It might be because we all love pot-stickers. In fact we usually buy the frozen ones and eat them as a snack, but after watching Alton Brown, I figured, how hard could this be? The only problem, was that I hated the ingredients he used. Along with the pork, ginger, soy sauce and scallions, he put in things like catsup and mustard! Really? How does that go in a pot-sticker? Convinced that there had to be a better way, I searched the internet and found dozens of recipes. I took what I liked from each of them and came up with my own version. I guess it was a success, because everyone loved them!Now, I must be brutally honest here. This is not a quick week-night meal. While the process is not at all difficult, it is very time consuming. I made about 80 pot-stickers and found it took me about 40 seconds to make each one. That was before cooking them, so you do the math.
Most of the recipes I read suggested making a large batch and before cooking, freezing them on a sheet pan and them and then transferring them to another container. This would be a good idea, but my whole family was here tonight and I knew I had to cook all of them. I actually had most of the ingredients here, but I was out of fresh ginger and needed to get scallions along with the wonton wrappers. Some of the recipes called for napa cabbage and some for regular cabbage. Since I already had regular cabbage in my fridge, I used that. Wonton wrappers are found in your local grocery store and are usually in the produce section near the tofu. One more thing, you will need to cook these in a skillet with a tight fitting lid. Do not use one of those super copper non stick pans, they won't cook properly. Pot-stickers got their name because they need to stick to the pot! Are you ready?
2 cups finely chopped cabbage (2 cups is about 1/4 of a small head of cabbage)
3/4 teaspoon salt
3/4 to 1 lb. of ground pork
a 1 inch piece of fresh ginger grated. Do not substitute ground ginger!
1 small carrot grated
3 scallions finely sliced, both white and green parts
3 cloves of garlic finely chopped or run through a garlic press
2 tablespoons soy sauce
1 teaspoon honey
1 tablespoon sesame oil
1 small egg beaten (if your eggs are extra large, use only half)
1 quart chicken broth
1 package won-ton wrappers (I used a package and a half and a whole pound of pork)
vegetable oil for frying
Begin by making sure the cabbage is finely chopped. Put in a bowl and sprinkle with the salt. Allow this to sit for 30 minutes. In another bowl whisk together the soy sauce, honey, sesame oil and egg. Add the pork, carrot and scallions and mix. After the cabbage has sat for thirty minutes, transfer it to a clean tea towel, twist and squeeze out all of the liquid. Squeeze really hard! Add the cabbage to the meat mixture and mix the whole thing with your hands like you are making meatloaf. Now comes the fun part.
Before you begin assembling the pot stickers cover a sheet pan with a piece of parchment paper. Dampen a tea towel. You will need to keep your pot-stickers covered with the towel until you cook them so they don't dry out. Place another damp towel over the wonton wrappers; you don't want those to dry out either! Also, place a small bowl of water in your work area so you can dip your fingers to dampen the edges of the wonton to seal.
Now place a small amount of filling at one corner of the wonton wrapper. Dip your finger into the water and moisten the two opposite sides.
Fold the wrapper over the filling and seal. Now make two pleats on each side of the triangle. Place under your damp towel and continue until all the wrappers or filling has been used up.

Now add a tablespoon or two of oil to your skillet and heat over medium high heat. Place about ten pot-stickers in the skillet. Do not touch them! There is no need to flip them over. Let them cook for two minutes - I actually set my timer. While they are cooking, pour 1/2 cup of chicken broth into a measuring cup with a pour spout. When they have cooked for two minutes, reduce the heat to low, pour the broth into the pan and cover. Cook for another 2 -3 minutes. Remove lid. You will see the pot-stickers deflate and become all wrinkly. That's what we want! Remove to a plate. Pour out excess chicken broth and repeat the process. Turning the heat to medium high when you first place them in the pan and reducing it to low when you add the broth.
You will probably not use the whole quart of chicken broth. I only had to add oil every two or three batches, but each time I added oil, I used a paper towel to wipe out the pan first.
I made these early in the afternoon. When it was time for dinner, I placed a steamer basket over a pan of boiling water and steamed them in batches for a few minutes to reheat them.
You can serve with soy sauce or make the following dipping sauce. This was a little spicy, so if that's not your thing, leave out the red pepper flakes.
To a small bowl, add:
1/2 cup soy sauce
1 teaspoon sesame oil
1 teaspoon rice wine vinegar
3 cloves of garlic grated or run through a garlic press
1 teaspoon of honey
1/4 teaspoon red pepper flakes.
Mix well and serve with the warm pot-stickers. I served this with Mongolian beef and broccoli, but that's a recipe for another day!
I hope you find the time to try these. It was really rewarding to see that I could make something so professional!
Feel free to leave questions or comments in the comments section below this post. I promise I will get back to you as quickly as possible. Let me know if you tried them, and how you liked them!
Happy cooking!
Carol
a.k.a. Nonnie
Sunday, March 12, 2017
I'm back and I have a correction to Chicken with 40 Cloves of Garlic!
I just discovered that I have not posted anything here for a year. The last recipe I posted was for Irish Soda Bread on St. Patrick's Day last year. Unfortunately, my life has been a bit topsy turvy for the past year. I was quite sick all summer and fall with a recurring health problem I have. At the end of October, I had surgery to correct the problem and I am finally back on my feet. The holidays consumed most of my time and energy since I was still recuperating. Then I had several commissioned quilt projects that I had to catch up on since I didn't really do any sewing the whole time I was sick. I can happily report that I am now back on my feet and up to my normal speed again.
So, about that correction I mentioned in my title, I plan to make the Chicken with 40 Cloves of Garlic for dinner tomorrow and decided to look up the recipe here instead of getting out the cookbook. After reading through the recipe to see if I need to purchase anything besides the pre-peeled garlic, I suddenly realized that I left out several ingredients from the ingredient list. My sincere apologies! I must not have proofread the recipe before I posted. I have made the corrections to the recipe. You really must try it if you haven't, it's one of my favorites. Just go to the "search" box to the right side of this post and type in the title of the recipe. Enjoy!
I think I'll be doing lots of cooking and baking this week. We are supposed to have a huge snow storm on Tuesday and snow always makes me want to get in the kitchen and play around. I have a few new recipes I'm working on, and I PROMISE to post them by the end of this week. See you then!
Happy Cooking,
Carol
a.k.a. Nonnie
So, about that correction I mentioned in my title, I plan to make the Chicken with 40 Cloves of Garlic for dinner tomorrow and decided to look up the recipe here instead of getting out the cookbook. After reading through the recipe to see if I need to purchase anything besides the pre-peeled garlic, I suddenly realized that I left out several ingredients from the ingredient list. My sincere apologies! I must not have proofread the recipe before I posted. I have made the corrections to the recipe. You really must try it if you haven't, it's one of my favorites. Just go to the "search" box to the right side of this post and type in the title of the recipe. Enjoy!
I think I'll be doing lots of cooking and baking this week. We are supposed to have a huge snow storm on Tuesday and snow always makes me want to get in the kitchen and play around. I have a few new recipes I'm working on, and I PROMISE to post them by the end of this week. See you then!
Happy Cooking,
Carol
a.k.a. Nonnie
Thursday, March 17, 2016
Happy St. Patrick's Day! Here's an Irish Soda Bread Recipe for you!
Many of you know that my heritage is Italian. All of my grandparents were born in Italy and came to this country in the early 1900's. I am very proud of my Italian heritage, but today everyone is Irish, including me!
Over the years, I have tried many different Irish Soda bread recipes, but I always seem to come back to this one as noted by how dirty the page is in my cookbook. This recipe came from the Sunset Cookbook of Breads published by the Lang Magazine and Book Company. The original was copyrighted in 1966. My edition was printed in 1975. It was my very first bread cookbook. I began all my bread baking adventures with this book. It is literally falling apart, so much so, that I purchased a second copy back in the mid 80's. Yet I always come back to the original one, even though I now have nearly two shelves of bread cookbooks, I can't bring myself to get rid of it.
This is a very easy recipe, it doesn't involve yeast or rising or any other usual bread making techniques, except for a little kneading. There are several variations, you can add caraway seeds, raisins, craisins, or currents. This recipe makes two loaves. I usually add craisins to one loaf and leave the other plain.
4 cups all purpose flour
1 teaspoon salt
3 teaspoons baking powder
1 teaspoon baking soda
1/4 cup sugar (optional)
1/8 teaspoon cardamom or coriander (optional)
1/4 cup (1/2 stick) butter
1 egg
1 3/4 cups buttermilk
This can be made in the food processor since you are cutting in the butter, but you can use the old fashioned method of two knives or a pastry blender to cut in the butter. Combine flour salt, baking powder, baking soda and sugar and spices (if using) in the bowl of a food processor. Pulse a few times to combine. Add butter and pulse until mixture looks like coarse crumbs. Do the same if you are using a pastry blender. Beat the egg slightly and mix with the buttermilk. Add to the mixture. Combine until blended. Turn dough out onto a lightly floured board and knead three or four times. Divide the dough in half and shape into round loaves. Place each loaf into a greased 8 inch round cake pan. Use a sharp knife and cut a cross about 1/2 inch deep into the top of each loaf. Bake at 375 degrees for 35 to 40 minutes. Turn loaves onto a rack to cool a few minutes. Serve with butter and jam or marmalade. Enjoy!
Happy cooking!
Carol
a.k.a
Nonnie
Over the years, I have tried many different Irish Soda bread recipes, but I always seem to come back to this one as noted by how dirty the page is in my cookbook. This recipe came from the Sunset Cookbook of Breads published by the Lang Magazine and Book Company. The original was copyrighted in 1966. My edition was printed in 1975. It was my very first bread cookbook. I began all my bread baking adventures with this book. It is literally falling apart, so much so, that I purchased a second copy back in the mid 80's. Yet I always come back to the original one, even though I now have nearly two shelves of bread cookbooks, I can't bring myself to get rid of it.
This is a very easy recipe, it doesn't involve yeast or rising or any other usual bread making techniques, except for a little kneading. There are several variations, you can add caraway seeds, raisins, craisins, or currents. This recipe makes two loaves. I usually add craisins to one loaf and leave the other plain.
4 cups all purpose flour
1 teaspoon salt
3 teaspoons baking powder
1 teaspoon baking soda
1/4 cup sugar (optional)
1/8 teaspoon cardamom or coriander (optional)
1/4 cup (1/2 stick) butter
1 egg
1 3/4 cups buttermilk
This can be made in the food processor since you are cutting in the butter, but you can use the old fashioned method of two knives or a pastry blender to cut in the butter. Combine flour salt, baking powder, baking soda and sugar and spices (if using) in the bowl of a food processor. Pulse a few times to combine. Add butter and pulse until mixture looks like coarse crumbs. Do the same if you are using a pastry blender. Beat the egg slightly and mix with the buttermilk. Add to the mixture. Combine until blended. Turn dough out onto a lightly floured board and knead three or four times. Divide the dough in half and shape into round loaves. Place each loaf into a greased 8 inch round cake pan. Use a sharp knife and cut a cross about 1/2 inch deep into the top of each loaf. Bake at 375 degrees for 35 to 40 minutes. Turn loaves onto a rack to cool a few minutes. Serve with butter and jam or marmalade. Enjoy!
Happy cooking!
Carol
a.k.a
Nonnie
Tuesday, March 8, 2016
Lettuce Wraps - A 30 Minute Meal!
The first time I ever ate lettuce wraps was at a P.F.Chang's in Denver. I was sold and knew I had to make these at home. This is a quick and easy dinner that goes together in less than thirty minutes. An internet search will bring you dozens of recipes. I combined several to come up with this one. You can choose what kind of lettuce to use. Iceberg works well, but its crispy leaves will often break, something with a soft leaf like Boston Bib works best, but I have even used Romaine. Hoisin sauce can be found in the Asian section of your grocery store. It's kind of like barbeque sauce, but sweeter and not smokey. Serve with sauce and chopped scallions. Enjoy!
1 head lettuce (bib, iceberg or even romaine)
1 pound ground chicken (you can substitute pork)
1 Tablespoons vegetable oil
1 small onion finely chopped
1 can water chestnuts diced
3 cloves of garlic finely chopped or run through garlic press
1 inch piece of fresh ginger grated
1/3 cup hoisin sauce
3 Tablespoons soy sauce or Tamari if you are gluten free
1 Tablespoon rice wine vinegar (can substitute cider vinegar)
1 Tablespoon sesame oil
1/2 to 1 teaspoon Sriracha sauce This is a hot sauce to give it a little kick, you can omit if you wish
3 scallions chopped (white and green parts)
Sauce for topping
Whisk together with a fork;
1/4 cup hoisin sauce
2 Tablespoons soy sauce
1 teaspoon sesame oil
Heat one tablespoon of oil in a skillet and add garlic, onion and ginger. Cook for about three minutes over medium heat until softened. Add chicken and cook about seven to ten minutes until no pink shows. Add hoisin, soy sauce, vinegar, Sriracha, if you are using, and water chestnuts. Cook through. Lastly, add sesame oil and stir to combine. Serve with lettuce. Put meat into whole lettuce leaves, add a bit of sauce and some chopped scallions, wrap and enjoy!
Feel free to leave questions or comments in the comment section below the post.
Happy Cooking!
Carol
a.k.a. Nonnie
1 head lettuce (bib, iceberg or even romaine)
1 pound ground chicken (you can substitute pork)
1 Tablespoons vegetable oil
1 small onion finely chopped
1 can water chestnuts diced
3 cloves of garlic finely chopped or run through garlic press
1 inch piece of fresh ginger grated
1/3 cup hoisin sauce
3 Tablespoons soy sauce or Tamari if you are gluten free
1 Tablespoon rice wine vinegar (can substitute cider vinegar)
1 Tablespoon sesame oil
1/2 to 1 teaspoon Sriracha sauce This is a hot sauce to give it a little kick, you can omit if you wish
3 scallions chopped (white and green parts)
Sauce for topping
Whisk together with a fork;
1/4 cup hoisin sauce
2 Tablespoons soy sauce
1 teaspoon sesame oil
Heat one tablespoon of oil in a skillet and add garlic, onion and ginger. Cook for about three minutes over medium heat until softened. Add chicken and cook about seven to ten minutes until no pink shows. Add hoisin, soy sauce, vinegar, Sriracha, if you are using, and water chestnuts. Cook through. Lastly, add sesame oil and stir to combine. Serve with lettuce. Put meat into whole lettuce leaves, add a bit of sauce and some chopped scallions, wrap and enjoy!
Feel free to leave questions or comments in the comment section below the post.
Happy Cooking!
Carol
a.k.a. Nonnie
Wednesday, February 3, 2016
Crockpot Chicken with Forty Cloves of Garlic
I can hear you now, "forty cloves of garlic!" " Is she crazy?" No really, it's fabulous. Slow cooking gives the garlic a sweet mellow flavor. This could easily be a company dish. Next your asking, did you really peel 40 cloves of garlic? No, I didn't; I used pre-peeled whole cloves in a jar. This develops a rich creamy sauce that goes well over noodles or rice. Serve with a vegetable and salad and you have a wonderful meal, and don't forget crusty bread to smear the garlic on. You can use a whole chicken, chicken breasts, thighs, bone in or not. It's up to you. This recipe came from Slow Cooker Revolution by America's Test Kitchen. It is my go to slow cooker recipe book. I have yet to make anything bad from this book. Enjoy!
1 whole, cut up chicken, or chicken breasts, legs, or thighs. It's your choice.
40 cloves of garlic, leave whole
2 - 4 tablespoons olive oil
4 shallots quartered end to end
3/4 cup white wine*
3/4 cup chicken broth
1/4 cup all purpose flour
1/2 teaspoon minced fresh rosemary (or 1/4 teaspoon dried)
2 teaspoons minced fresh thyme ( or 1/2 teaspoon dried)
2 bay leaves
2 tablespoons minced fresh parsley
Salt and pepper
* If you don't want to use the wine, just change the amount of chicken broth to 1 1/2 cups
Begin by drying chicken and seasoning with salt and pepper. Heat 2 tablespoons of olive oil in a large skillet over medium high heat. Add the chicken a few pieces a a time and lightly brown on all sides. Remove to a plate and cook the rest of the chicken in the same way. If you have used chicken with skin, remove the skin at this point. If you need more oil in the pan add the rest of the olive oil, shallots and garlic. Cook over medium heat for about 8 minutes until they become soft and golden. Add flour to the pan, stir and cook about 2 - 3 minutes. Then add wine, and stir up any bits on the bottom of the pan. Add the chicken broth, raise the heat until sauce begins to thicken. Add the sauce to the crockpot along with rosemary, thyme, and bay leaves. Stir to combine and add the chicken and any juices that are on the plate. Cook on low for about 5 - 6 hours. Remove the chicken and skim any fat from the sauce. Adjust seasoning. and serve over noodles or rice and garnish with parsley. Enjoy! Don't forget to leave questions and comments in the comments section below this post, and please share with your friends!
Happy Cooking!
Carol
a.k.a.
Nonnie
1 whole, cut up chicken, or chicken breasts, legs, or thighs. It's your choice.
40 cloves of garlic, leave whole
2 - 4 tablespoons olive oil
4 shallots quartered end to end
3/4 cup white wine*
3/4 cup chicken broth
1/4 cup all purpose flour
1/2 teaspoon minced fresh rosemary (or 1/4 teaspoon dried)
2 teaspoons minced fresh thyme ( or 1/2 teaspoon dried)
2 bay leaves
2 tablespoons minced fresh parsley
Salt and pepper
* If you don't want to use the wine, just change the amount of chicken broth to 1 1/2 cups
Begin by drying chicken and seasoning with salt and pepper. Heat 2 tablespoons of olive oil in a large skillet over medium high heat. Add the chicken a few pieces a a time and lightly brown on all sides. Remove to a plate and cook the rest of the chicken in the same way. If you have used chicken with skin, remove the skin at this point. If you need more oil in the pan add the rest of the olive oil, shallots and garlic. Cook over medium heat for about 8 minutes until they become soft and golden. Add flour to the pan, stir and cook about 2 - 3 minutes. Then add wine, and stir up any bits on the bottom of the pan. Add the chicken broth, raise the heat until sauce begins to thicken. Add the sauce to the crockpot along with rosemary, thyme, and bay leaves. Stir to combine and add the chicken and any juices that are on the plate. Cook on low for about 5 - 6 hours. Remove the chicken and skim any fat from the sauce. Adjust seasoning. and serve over noodles or rice and garnish with parsley. Enjoy! Don't forget to leave questions and comments in the comments section below this post, and please share with your friends!
Happy Cooking!
Carol
a.k.a.
Nonnie
Friday, January 29, 2016
Cheesy Shepard's Pie with a Twist
I have confessed to you before that I am addicted to cooking shows. Well for some reason, this week, nearly every cooking show, or cooking segment on a morning show has made some sort of casserole. Is it national casserole week? I don't know, but I figured I'd jump in on the bandwagon.
As you know, I grew up in a very Italian family and I had never heard of Shepard's Pie until I went to middle school got to eat cafeteria food for the first time in my life. Well the Shepard's Pie in my school cafeteria was a scary concoction of ground beef, vegetables and gooey mashed potatoes on top. Back in the 70's when casseroles were all the rage, I tried to feed my family Shepard's Pie a few times, but it was not a hit.
This morning on the Today Show, Al Roker made Shepard's pie, and I got the idea I would try it again. I did change his recipe drastically. He used ground beef, I used left over cooked chicken. He made his gravy with dark beer and bullion, I used white wine and chicken stock, but I did like his idea of putting cream cheese and sour cream in the mashed potatoes though. Yumm.
This is a meal that lends itself to using up left overs, which is what prompted me to try it. I had some left over cooked chicken in the freezer, left over green beans from dinner the other night, as well as a little bit of left over mashed potatoes. I did have to cook more potatoes to make sure there was enough.
This is one of those recipes that you can adapt to whatever you have in your kitchen. Feel free to change up the combination of vegetables. Use red and green peppers if you like, or frozen mixed vegetables, the possibilities are endless. The ingredient list is long, but this went together in the time it took me to cook the potatoes, honestly! Have fun with this!
3 cups diced cooked chicken
2 large potatoes cut up
1 onion diced
2 cloved minced garlic
1 cup of carrots diced
1 green beans, cut into small pieces
1 cup frozen corn
6 tablespoons butter divided
3 tablespoons flour
1/2 cup white wine
about 2 cups chicken stock plus more for the mashed potatoes
2 tablespoons worcestershire sauce
1/2 teaspoon dried rosemary
1/2 teaspoon pepper
1 teaspoon salt
1/2 cup cream cheese
1/2 cup sour cream
1/2 cup grated parmesan cheese
1/4 teaspoon garlic powder (do not use garlic salt)
1/2 cup grated cheddar cheese
Begin by boiling the potatoes in salted water. Melt 3 tablespoons of the butter in a large skillet and add the onions, carrots and garlic. When the vegetables have softened after about five minutes add the corn, green beans, salt, pepper and rosemary. Saute until the corn is cooked. Now add the flour of the pan and cook for about three minutes over medium high heat. Add the wine and scrape up any bits on the bottom of the pan. Add the chicken broth and worcestershire and cook over high heat until mixture thickens. You may add more broth if it gets too thick. Remove from heat and add the parmesan cheese. Mix well. Prepare a casserole dish with non stick cooking spray and pour the mixture into the casserole. Now drain the potatoes and return to the pot. Add the cream cheese, sour cream butter and garlic powder, a sprinkle of salt and pepper and mash. Add chicken broth until you have a smooth consistency. Spread the potatoes over the casserole and top with cheese. Bake at 350 degrees for 30 minutes. Remove from the oven, Heat your broiler, and place under the broiler for about three minutes, or until the top begins to brown. Enjoy!
Please leave questions and comments in the comment section below this post and don't forget to share with your friends!
Happy Cooking!
Carol
a.k.a.
Nonnie
Tuesday, January 26, 2016
A New Kind of "Pizza" Dough.
What I found really interesting about the recipe was the dough. I pretty much changed up the toppings, but I wanted to try this dough. There is no yeast, and its made with olive oil. If you are a fan of thin crust pizza, which I am, then this is for you. It is so much easier than traditional pizza dough, and even though I have told you to purchase your pizza dough ready made, this is still easier. The magic comes in rolling it out. Traditional pizza dough is like working with silly putty. You roll it out and it just springs back; it takes work and skill to get it really thin. This is so easy to roll out. Also she makes some suggestions for baking that I found really helpful. This does not lend itself to wet soggy tomato sauce, it is more of a rustic pie, but oh so good! I am going to give you the dough recipe and some suggestions for toppings. This recipe makes enough for one large sheet pan. Feel free to double it. Have fun!
Olive oil dough:
2 cups all purpose flour
1 teaspoon baking powder
1 teaspoon salt
1/3 cup good olive oil
2/3 cup warm water
Mix the dry ingredients in a bowl and stir with a fork to combine. Combine oil and water and add to the flour mixture. I used a fork and then a wooden spoon to combine, and finally, a few quick turns with my hands. Cover with a dishtowel and let rest for 1/2 hour. You can let it rest as long as 24 hours. This is a very soft, moist dough.
While the dough is resting, you can pre-heat your oven to 425 degrees and prepare your toppings. About 15 minutes before you are ready to bake your pie, place your sheet pan in the oven to preheat. This little trick helps to make sure you have a crisp crust.
Now for toppings. I thinly sliced two onions and minced about 6 cloves of garlic. I sauteed this in about two tablespoons of olive oil until they were soft and caramelized, about 10 minutes. Next I prepared grape tomatoes but cutting in half and squeezing out the juice. Finally, the original recipe called for using uncooked Italian sausage as a topping, but I didn't want to defrost a whole package of sausage for just a few sausages, so I cut up some pepperoni into tiny bits and cooked it in a skillet to render out the fat. I also used kalamata olives, grated Asiago cheese, pesto which I had in the freezer, dried rosemary and dried basil.
Next cut a piece of parchment paper to fit your pan. Flour the paper and roll out your dough into a large rectangle. Turn over the edges to make a kind of lip around the outside. Next I covered it with the cooked onions and garlic. Then I put on the tomatoes, olives, pepperoni, herbs, a few blobs of pesto and cheese. Remove the hot pan from the oven, lift the parchment and place onto the pan. Return to the oven and bake for 30 minutes. I will admit the lifting of the parchment was a bit tricky as the dough folded over on itself, but it was an easy repair because this is such a forgiving dough.
Experiment with toppings. I would love to try broccoli, zucchini or other veggies. What about cooked chicken? The original recipe did not have cheese, but I added just a little. Try other cheeses and experiment with your toppings. Let me know how yours turned out! Don't forget that you can leave questions and comments in the comments section just below this post. Also please feel free to share with friends!
Happy cooking!
Carol
a.k.a.
Nonnie
Thursday, December 31, 2015
Really great hot pinwheel appetizers!
The original recipe called for canned pizza dough, but I used crescent roll sheets because that's what I had in my fridge. (Pizza dough has less fat, so substitute if that's a concern) I tend to keep these around since I find so many uses for them. You can use regular crescent rolls, but then you have to smush (a very technical culinary term) all the seams together. I will give you my original recipe and then my variation. One canned crescent roll sheet gives you about 15 pinwheels. I ended up making three batches! Here goes!
1 canned crescent roll sheet
1/2 pound thinly sliced deli ham
1/2 pound sliced swiss cheese
3 tablespoons mayonnaise
1/4 cup dijon mustard
2 teaspoons worcestershire sauce
1/2 to 1 teaspoon pepper
Preheat oven to 400 degrees. Open the can of crescent roll sheet onto a floured surface roll out to about a 9" by 15" rectangle. Mix mayo, mustard, worcestershire sauce and pepper in a small bowl. Spread mayo mixture over the dough. Now put a layer of ham slices over the dough, then a layer of cheese slices and finally another layer of ham slices. Leave about an inch open at one of the long sides. Now, starting on the long side and working towards the inch you left without filling, roll the whole thing together TIGHTLY like you would for cinnamon rolls, or a jelly roll, and pinch the long side shut. Now cut the log into slices about 1/2 inch thick. Place a toothpick through the pinwheel to hold it together. Place on a cookie sheet which you have covered with parchment.
Bake for 15 to 20 minutes. Keep an eye on them, it depends on your oven. Remove when they are golden brown. Transfer to a wire rack to cool, or eat hot from the oven. Remove the toothpicks and serve. How easy was that! These can be made in advance and reheated. You can even freeze them, and then thaw and reheat.
For the second batch, I spread the dough with about 3 tablespoons of mayonnaise to which I added two or three tablespoons of pesto. Sprinkle with grated parmesan cheese and layer with deli turkey and swiss cheese instead of the ham. Roll and secure and bake as before. We almost liked the turkey ones better! Experiment! I'm sure any number of fillings would be great. What about pepperoni and mozzarella? Roast beef and horseradish sauce? Or just cheese if you're vegetarian? I could keep going here, but you get it!
Well, I'm on my way to my party. I wish you all a safe and happy New Year. May the new year bring you health, blessings and happiness! See you in 2016!
Happy Cooking!
Carol
a.k.a. Nonnie
Wednesday, December 30, 2015
Fettuccine with spinach and ricotta
Please forgive the long pause between posts, but I have been having some minor health issues that are now pretty much under control. I'm back in the kitchen and raring to go!
I hope that you all had a wonderful holiday and are preparing for a healthy and prosperous New Year. If you are not planning to go out for a big fancy meal on New Year's Eve, here is something rather easy and elegant, you can make at home. This meal took less than thirty minutes to prepare and can certainly qualify as an easy weeknight meal. I have been watching lots of cooking shows on television and I get lots of inspiration from them. This is a recipe I saw on "Lydia's Kitchen" that I have adapted to make my own. I left some of her ingredients out and added a few of my own.
This recipe calls for pancetta which is a kind of Italian bacon. Most supermarkets carry it, but feel free to substitute bacon. It also calls for pignoli nuts, also called pine nuts. They can be a bit pricey, so feel free to substitute chopped walnuts, pistachios, or hazelnuts.
1 pound fettuccine
1/2 cup pignoli or other nuts (if substituting other nuts make sure to chop them)
1/2 cup finely chopped pancetta (if using bacon, use about four slices and chop before cooking)
3 tablespoons olive oil
1/4 cup white wine (you can substitute chicken broth)
2 cloves garlic, finely chopped
1/4 teaspoon ground nutmeg - use fresh and grate yourself if you have it, but don't try to measure, just a several times over the grater will do.
1 pound fresh baby spinach
1/2 teaspoon freshly ground pepper
16 ounce container of ricotta cheese
1/2 cup freshly grated parmesan cheese plus more for serving
Begin by cooking the fettuccine in salted water. You will prepare the sauce in the time it takes to boil the water and cook the pasta.
Add about half a tablespoon olive oil to a large skillet and turn the heat to medium. Place the pignoli nuts in the pan. Do not leave the pan! These will burn in about 45 seconds. Stir until they begin to turn brown. Remove quickly. Add the pancetta to the pan and cook until it is crisp. Now add the olive oil and garlic to the pan. When the garlic begins to soften, add the wine and scrape any bits off the bottom of the pan. Turn the heat to high for just a minute to let the alcohol cook off. Add the spinach to the pan and lower the heat to medium. Use tongs to continually stir the spinach until it is wilted. Add the nutmeg and pepper and stir. When the spinach is wilted after about five to seven minutes, add the ricotta and stir until it is softened. If the mixture seems thick add about a cup of water from the pasta pot to the pan. When the pasta is cooked, add it to the pan. Stir to thoroughly mix and turn off the heat. Add parmesan and stir. Transfer to a bowl and add pignolis and serve with additional parmesan. Enjoy!
Remember you can leave questions or comments in the comment section below this post. Please feel free to share with friends and family!
I would like to thank you all for your support this past year. Here's hoping that next year will be even better! I hope you all have a very happy and healthy New Year!
Happy Cooking!
Carol
a.k.a Nonnie
Friday, November 20, 2015
Quick,savory stove top pork chops
This is a quick meal that can be made on a weeknight. I used thick cut boneless pork chops (about 3/4 inch), but this will work with thin chops or those with a bone, just don't cook them as long, and use a thermometer to check the temperature. We no longer need to cook pork to death as we did years ago as trichinosis has all but been eliminated with modern pig farming techniques. Just be sure that the internal temperature of your meat is at 150 degrees. This is great served over rice or egg noodles.
4 pork chops
3 cloves garlic finely minced
2 shallots finely minced
3 Tablespoons soy sauce
2 tablespoons brown sugar
1/4 teaspoon red pepper flakes
1 cup beef broth plus extra if needed
1 Tablespoon flour
1/2 cup white wine
2 Tablespoons olive or vegetable oil
1/4 cup water
1 tablespoon cornstarch
Note: I don't always have beef broth in my pantry, but chicken broth will work just as well. If you like a deeper flavor, just add a bullion cube or a half teaspoon of beef base.
Heat oil in a heavy bottomed skillet over medium high heat. When the oil is shimmering, place pork chops in the pan. Don't fiddle with them, just let them cook and turn after 2 or 3 minutes. Cook on the other side for another 2 - 3 minutes. While you are searing the chops mix soy sauce, brown sugar beef broth and red pepper flakes in a small bowl. Remove pork chops to a plate and cover with foil. Add the garlic and shallots to the pan and lower the heat to medium. As soon as shallots and garlic soften, sprinkle with flour and cook for 2 more minutes. Add the wine to the pan and scrape up any brown bits on the bottom of the pan. Add broth soy sauce mixture to the pan. Mix the cornstarch with water and add to the pan. Raise heat to medium high and stir until sauce begins to thicken. If sauce becomes too thick, add more beef broth. Add the pork chops back to the pan, cover and cook over low heat for about ten minutes. After ten minutes, check temperature of the meat, if it has not reached 150 degrees cook a little longer. Serve over rice or noodles and pour sauce on top. Include a green vegetable and salad for a healthy meal! Enjoy!
Please feel free to leave questions or comments in the "comment" section below this post. Let me know how you liked it!
Happy Cooking!
Carol
a.k.a. Nonnie
4 pork chops
3 cloves garlic finely minced
2 shallots finely minced
3 Tablespoons soy sauce
2 tablespoons brown sugar
1/4 teaspoon red pepper flakes
1 cup beef broth plus extra if needed
1 Tablespoon flour
1/2 cup white wine
2 Tablespoons olive or vegetable oil
1/4 cup water
1 tablespoon cornstarch
Note: I don't always have beef broth in my pantry, but chicken broth will work just as well. If you like a deeper flavor, just add a bullion cube or a half teaspoon of beef base.
Heat oil in a heavy bottomed skillet over medium high heat. When the oil is shimmering, place pork chops in the pan. Don't fiddle with them, just let them cook and turn after 2 or 3 minutes. Cook on the other side for another 2 - 3 minutes. While you are searing the chops mix soy sauce, brown sugar beef broth and red pepper flakes in a small bowl. Remove pork chops to a plate and cover with foil. Add the garlic and shallots to the pan and lower the heat to medium. As soon as shallots and garlic soften, sprinkle with flour and cook for 2 more minutes. Add the wine to the pan and scrape up any brown bits on the bottom of the pan. Add broth soy sauce mixture to the pan. Mix the cornstarch with water and add to the pan. Raise heat to medium high and stir until sauce begins to thicken. If sauce becomes too thick, add more beef broth. Add the pork chops back to the pan, cover and cook over low heat for about ten minutes. After ten minutes, check temperature of the meat, if it has not reached 150 degrees cook a little longer. Serve over rice or noodles and pour sauce on top. Include a green vegetable and salad for a healthy meal! Enjoy!
Please feel free to leave questions or comments in the "comment" section below this post. Let me know how you liked it!
Happy Cooking!
Carol
a.k.a. Nonnie
Thursday, October 1, 2015
Delicious cheesy zuccinni rounds
These are fabulous. They were almost all eaten before I could take a photo! The original recipe came from Ellie Krieger on the Food Network. I made a few changes to the breading. They were quick and easy. The kids loved them, and they are really healthy! This recipe makes two large sheet pans full, but you could easily halve it. Feel free to change up the cheeses, maybe add a little cheddar or Monterrey Jack and some hot pepper flakes for a little kick. Have fun with this and let me know how you like it!
Use small zucchini so you don't get that seedy pithy middle. I used ones that were about an inch and a half in diameter. I used four,you could easily use more or less. Another hint is to use parchment paper to cut down on sticking. I sprayed it with cooking spray and it helped minimize clean up.
4 small zucchini
3/4 cup bread crumbs
3/4 cup grated Parmesan cheese plus extra for topping
1 tablespoon dried basil
1/2 teaspoon garlic powder - do not use garlic salt
1/2 teaspoon pepper
2 tablespoons olive oil
cooking spray
Preheat oven to 450 degrees and prepare two large sheet pans with parchment paper sprayed with cooking spray. Slice zucchini into 1/4 inch rounds and place them in a bowl. Pour olive oil over zucchini and mix with your hands and make sure they are all coated with oil. In another bowl combine bread crumbs cheese and seasonings. Coat zucchini and press crumbs into them. Lay on the sheet pan and sprinkle them with extra Parmesan cheese. Bake for 25 to 30 minutes until golden brown and crisp on top. Enjoy!
Feel free to share with friends and don't forget to leave questions and comments in the comment section below the post.
Happy Cooking!
Carol
a.k.a.
Nonnie
Saturday, September 26, 2015
Peach Cobbler
Last week my granddaughter and I went apple and peach picking. Today, I discovered that there were still quite a few peaches left in the fridge, and they were about to go bad, so I decided to make peach cobbler for dessert tonight. I usually use Bisquick to make a cobbler, but tonight I tried a recipe using flour, sugar and butter to make the topping. This was a big success!
Here is a hint for peeling your peaches. Dip each peach into boiling water for a minute or so and they will peel easily. I changed the filling recipe quite a bit by adding more ingredients to build the flavor.
I actually peeled and sliced the peaches earlier in the day and made the cobbler later. The peeling and slicing was the most time consuming part. I served this with a scoop of vanilla bean ice cream and it was perfect!
Here is the recipe.
For the filling:
8 large peaches - peeled and sliced - about 10 cups
1/4 cup white sugar
1/4 cup brown sugar
2 teaspoons vanilla
1 teaspoon cinnamon
1/8 teaspoon nutmeg (I use whole nutmeg and grate it on a micro-plane grater, but already ground is fine.)
2 teaspoons cornstarch
juice of half a lemon
Preheat oven to 425 degrees. Butter a two to three cup ovenproof casserole. Combine sugars, cornstarch and spices and pour over peaches. Add lemon juice. Mix to combine all. Pour into the casserole and bake for ten minutes.
While the peaches are in the oven, prepare the topping.
1 cup flour
1/4 cup white sugar
1/4 cup brown sugar
1 teaspoon baking powder
1/2 teaspoon salt
6 tablespoons very cold butter, cut into small pieces
1/4 cup boiling water
Mix dry ingredients together. I used the food processor and pulsed the dry ingredients a few times. Add the butter. Use the food processor, or a pastry blender and mix until the mixture resembles coarse meal. Add the water and mix until combined. Mixture will resemble soft dough.
Take the peaches out of the oven and drop spoonfuls of dough mixture on top. You will probably not cover the whole surface, but don't worry about this, it will spread in the oven. Sprinkle a mixture of 3 tablespoons white sugar mixed with one teaspoon cinnamon over the top of the dough. Return to the oven and bake for 25 to 30 minutes, or until the topping is golden and peaches are bubbling. Spoon into bowls and top with vanilla ice cream, heavy cream or whipped cream. Enjoy!
Please let me know if you made this and how it turned out. I welcome your questions and comments, just use the "comments" section at the bottom of this post! Also please feel free to share this post or any other with your friends. The more the merrier!
Happy Cooking!
Carol
a.k.a.
Nonnie
Friday, September 11, 2015
How about Hummus?
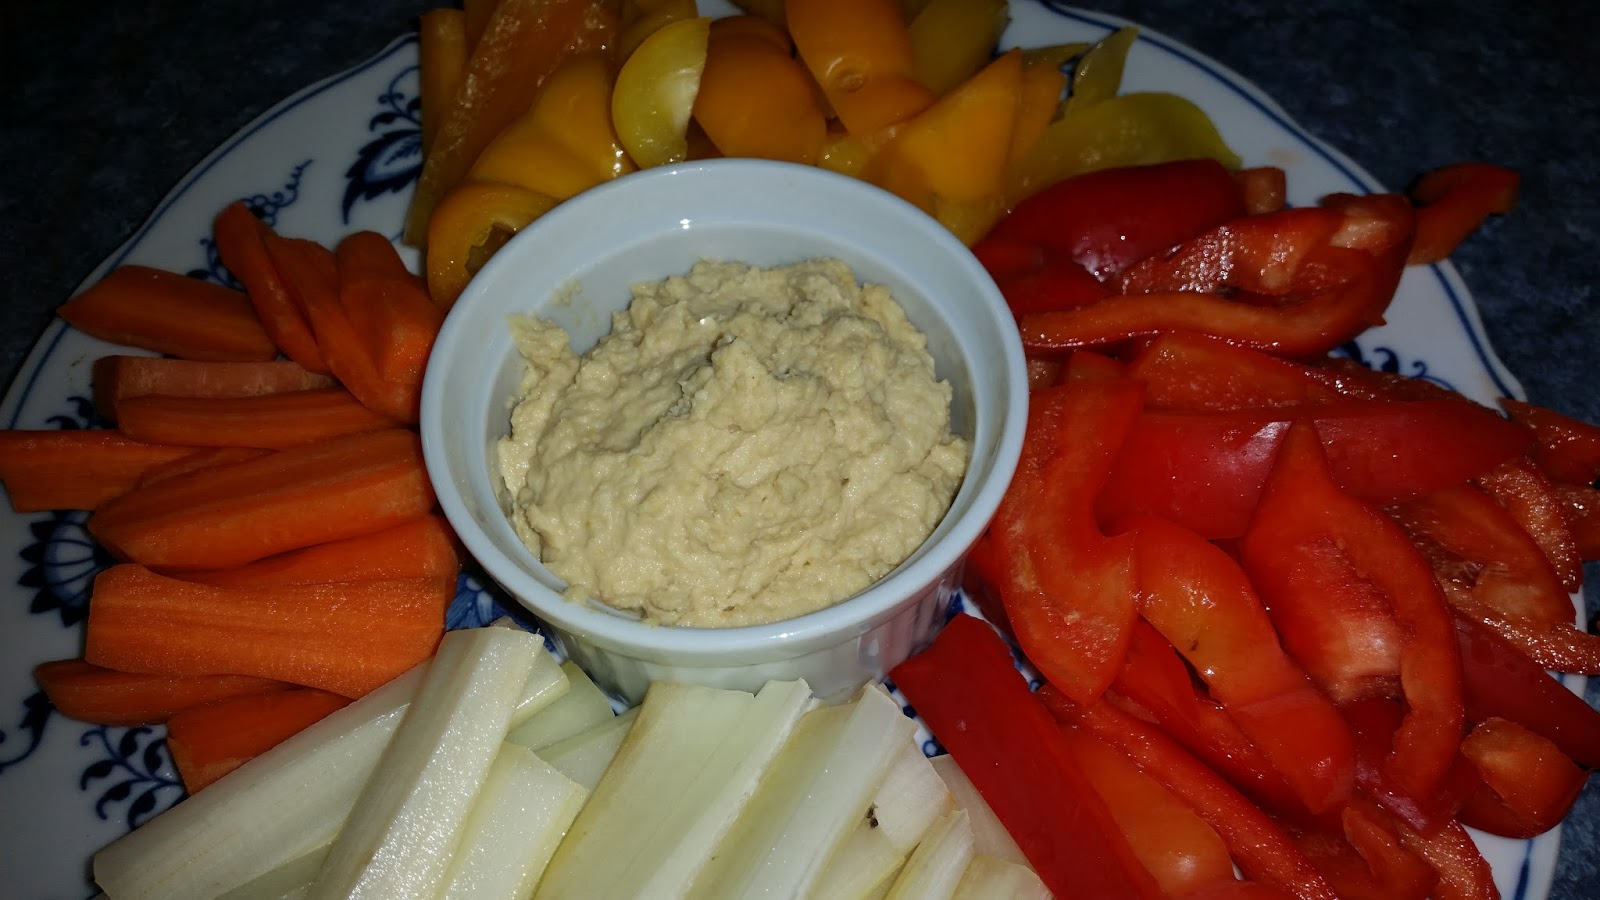
Hummus with fresh veggies
While I did say it's cheaper to make your own hummus, you have to factor in the price of sesame tahini. Tahini is a paste kind of like peanut butter made from sesame seeds. It's a little pricey, but you only use a quarter cup, so a jar lasts quite a while. The cheapest way to make this is to buy the beans dried and soak and cook them, but that is just too much trouble for the few pennies you save. You can usually find chick peas (also called garbanzos) for less than a dollar a can. Look in the Spanish food section, since they are usually a little cheaper there. The hardest part of this recipe is peeling and slicing the garlic. I used to throw in the cloves whole and chop them with the chick peas, but this recipe has you slice and simmer the garlic in olive oil. What a difference! Raw garlic can have kind of a bite, simmering it just until it softens gives you a milder, gentler garlic flavor. I do recommend using a food processor for this, because in a blender you have to blend the chick peas in small batches.
There are debates as to whether you should remove the thin skin from the chickpeas. Don't waste your time! One of my favorite most reliable sources tried it both ways and said there is no difference in taste as long as they are well blended. We want to make this easy not painful!!
When you serve this, it's best to take it out of the fridge and let it come to room temperature. You can also add a little drizzle of olive oil to the top along with some parsley and paprika. Okay here we go!
2 cans of chickpeas
1/2 cup olive oil
1/4 cup sesame tahini
juice of 1 lemon
6 large garlic cloves peeled and thinly sliced
1 teaspoon salt
Drain the beans, but reserve about 1 cup of the liquid. Pour olive oil into a small pan, add the garlic and heat over medium heat. Keep a close watch on the garlic! You only want to soften it, not brown it. Browned garlic is bitter and yucky. Add the chickpeas, tahini, salt, and lemon juice to the food processor and blend; the mixture will be VERY thick. Remove the garlic from the oil using a slotted spoon, add to the food processor and continue to blend. While the food processor is running, add the oil from the pan in a slow stream. If the mixture still seems thick to you, add some of the reserved liquid a little at a time until you reach a desired consistency. Taste and check for seasoning, sometimes if my lemons are a little small, I may add more lemon juice, but that is just personal preference. You can adapt this recipe by adding things like roasted red peppers from a jar, but just add a little at a time as you are mixing the chickpeas and taste as you go. Enjoy!
Happy Cooking,
Carol
a.k.a. Nonnie
Tuesday, August 25, 2015
Everyone's Favorite Granola
Granola and vanilla yogurt - my favorite breakfast!
This is so good that friends tell me I should sell it! I haven't made this in a while, and I was just caving yogurt and granola so I decided to give it a go. The thing I love most about this recipe is that it's all natural. No additives. Check store bought granola and see what's in it. This is really easy. Just assemble your ingredients, mix a few things together, and pop it in the oven. Here are some hints. Place parchment in your baking pans, clean up will be soooooo much easier! Keep an eye on this while it's in the oven. I check it every 15 minutes and give it a stir to keep the color even. When you take it out of the oven, it will seem a little "gooey", but as soon as it cools it crisps up. Let it cool completely before you transfer it to a storage container so it doesn't stick together.
Assemble your ingredients.
I will give you a basic recipe, but add and subtract what you like. The original recipe called for raisins, I use Craisins because I like them better. It also called for one cup of cashews, but I don't use them. You could add any other kind of nut you like, or none if you have allergies. The original recipe calls for brown sugar. I used to make it with brown sugar, but have now substituted coconut sugar. If you don't want to spend extra, use brown sugar; it tastes just as good. I also always use coconut oil, but you can substitute any healthy vegetable oil. I have also added finely chopped dried apricots, other dried fruit, or sunflower seeds. It pretty much depends what I have in the house.
3 cups old fashioned rolled oats
1 cup slivered almonds
1 cup shredded coconut, I use the sweetened
1/4 cup plus 2 tablespoons honey (you can substitute REAL maple syrup)
1/4 cup plus 2 tablespoons brown sugar or coconut sugar
1/4 cup coconut or vegetable oil
3/4 teaspoon salt
1 cup raisins or Craisins
Let the granola cool completely!
Mix oats, coconut and almonds together in a large bowl. If you are adding cashews or other nuts and them to the bowl also. Mix oil, honey and salt in a small bowl. Pour over oat mixture and stir well to make sure the liquid is incorporated into all the oats. Spread on two pans prepared with parchment. I use rimmed cookie sheets. Bake at 250 degrees for 1 hour and 15 minutes. Check and stir every 15 minutes. and when half the cooking time is over, switch the pans on the racks. Let cool completely. Mix in Craisins, sunflower seeds or any other ingredients. Transfer to tightly covered storage container. I like these giant, 2 liter mason jars, but any container with a tight fitting lid will do. Enjoy!As always, I welcome questions or comments. Feel free to comment in the comment section below this post.
Happy Cooking!
Carol
a.k.a. Nonnie
Tuesday, July 28, 2015
Zucchini Potato Pancakes
Here's another zucchini recipe. The squash borers have attacked my zucchini, so I won't have many more. I wish I could find a way to prevent this from happening, but alas, even my master gardener friends don't have an answer.
So for the past few weeks, I have been using zucchini nearly every day. This recipe was a favorite of my family, so I'm sharing it with you. Now you will see that there is a lot of grating going on here. Grated zucchini will keep for several days in the fridge, if you want to do it ahead, but don't do the potato ahead because it will turn black. I use the grater blade on my food processor and this whole process takes minutes.
1 - 2 zucchini grated
1 large potato grated
1 small onion grated
1 egg, beaten
1 cup flour
1 teaspoon baking powder
3 tablespoons fresh parsley chopped, or 1 tablespoon dried
1/2 to 1 cup grated parmesan cheese
salt and pepper 1/2 teaspoon each
vegetable oil for frying
Combine all ingredients and mix well. Heat oil in a skillet over medium high heat. Drop by spoonfuls into the hot oil and cook about 2 minutes, flip over and cook another minute or so. Serve as a side dish with dinner. I originally made these without the cheese, so that is an option, or you could substitute finely grated cheddar. You can also add grated yellow crookneck squash to the mixture. For a less fattening version, drop onto a lightly oiled hot griddle.
Let me know how you like these. Please feel free to leave comments or questions in the comments section below this post and I will get back to you as soon as possible.
Happy Cooking!
Carol
a.k.a. Nonnie
So for the past few weeks, I have been using zucchini nearly every day. This recipe was a favorite of my family, so I'm sharing it with you. Now you will see that there is a lot of grating going on here. Grated zucchini will keep for several days in the fridge, if you want to do it ahead, but don't do the potato ahead because it will turn black. I use the grater blade on my food processor and this whole process takes minutes.
1 - 2 zucchini grated
1 large potato grated
1 small onion grated
1 egg, beaten
1 cup flour
1 teaspoon baking powder
3 tablespoons fresh parsley chopped, or 1 tablespoon dried
1/2 to 1 cup grated parmesan cheese
salt and pepper 1/2 teaspoon each
vegetable oil for frying
Combine all ingredients and mix well. Heat oil in a skillet over medium high heat. Drop by spoonfuls into the hot oil and cook about 2 minutes, flip over and cook another minute or so. Serve as a side dish with dinner. I originally made these without the cheese, so that is an option, or you could substitute finely grated cheddar. You can also add grated yellow crookneck squash to the mixture. For a less fattening version, drop onto a lightly oiled hot griddle.
Let me know how you like these. Please feel free to leave comments or questions in the comments section below this post and I will get back to you as soon as possible.
Happy Cooking!
Carol
a.k.a. Nonnie
Monday, July 27, 2015
A Quick and Healthy Summer Dessert
I had some beautiful white peaches and I wanted to use them before they got too soft. My chef friend made something similar at our last farm to table meeting, so I thought I'd play around with it. Here's what you'll need.
Summer Peach and Blueberry Compote
4 peaches, pitted and sliced
1 to 2 cups blueberries
1 cup plain Greek yogurt
1 tablespoon honey
1/2 teaspoon cinnamon
1 teaspoon vanilla
Combine yogurt, honey, vanilla and cinnamon. Put peaches and blueberries in a bowl. Top with yogurt mixture. Mix and serve. How easy is that? This recipe was kid tested and they loved it!
Happy Cooking!
Carol
a.k.a. Nonnie
Summer Peach and Blueberry Compote
4 peaches, pitted and sliced
1 to 2 cups blueberries
1 cup plain Greek yogurt
1 tablespoon honey
1/2 teaspoon cinnamon
1 teaspoon vanilla
Combine yogurt, honey, vanilla and cinnamon. Put peaches and blueberries in a bowl. Top with yogurt mixture. Mix and serve. How easy is that? This recipe was kid tested and they loved it!
Happy Cooking!
Carol
a.k.a. Nonnie
Subscribe to:
Posts (Atom)


