This is a quick meal that can be made on a weeknight. I used thick cut boneless pork chops (about 3/4 inch), but this will work with thin chops or those with a bone, just don't cook them as long, and use a thermometer to check the temperature. We no longer need to cook pork to death as we did years ago as trichinosis has all but been eliminated with modern pig farming techniques. Just be sure that the internal temperature of your meat is at 150 degrees. This is great served over rice or egg noodles.
4 pork chops
3 cloves garlic finely minced
2 shallots finely minced
3 Tablespoons soy sauce
2 tablespoons brown sugar
1/4 teaspoon red pepper flakes
1 cup beef broth plus extra if needed
1 Tablespoon flour
1/2 cup white wine
2 Tablespoons olive or vegetable oil
1/4 cup water
1 tablespoon cornstarch
Note: I don't always have beef broth in my pantry, but chicken broth will work just as well. If you like a deeper flavor, just add a bullion cube or a half teaspoon of beef base.
Heat oil in a heavy bottomed skillet over medium high heat. When the oil is shimmering, place pork chops in the pan. Don't fiddle with them, just let them cook and turn after 2 or 3 minutes. Cook on the other side for another 2 - 3 minutes. While you are searing the chops mix soy sauce, brown sugar beef broth and red pepper flakes in a small bowl. Remove pork chops to a plate and cover with foil. Add the garlic and shallots to the pan and lower the heat to medium. As soon as shallots and garlic soften, sprinkle with flour and cook for 2 more minutes. Add the wine to the pan and scrape up any brown bits on the bottom of the pan. Add broth soy sauce mixture to the pan. Mix the cornstarch with water and add to the pan. Raise heat to medium high and stir until sauce begins to thicken. If sauce becomes too thick, add more beef broth. Add the pork chops back to the pan, cover and cook over low heat for about ten minutes. After ten minutes, check temperature of the meat, if it has not reached 150 degrees cook a little longer. Serve over rice or noodles and pour sauce on top. Include a green vegetable and salad for a healthy meal! Enjoy!
Please feel free to leave questions or comments in the "comment" section below this post. Let me know how you liked it!
Happy Cooking!
Carol
a.k.a. Nonnie
Friday, November 20, 2015

Thursday, October 1, 2015
Delicious cheesy zuccinni rounds

These are fabulous. They were almost all eaten before I could take a photo! The original recipe came from Ellie Krieger on the Food Network. I made a few changes to the breading. They were quick and easy. The kids loved them, and they are really healthy! This recipe makes two large sheet pans full, but you could easily halve it. Feel free to change up the cheeses, maybe add a little cheddar or Monterrey Jack and some hot pepper flakes for a little kick. Have fun with this and let me know how you like it!
Use small zucchini so you don't get that seedy pithy middle. I used ones that were about an inch and a half in diameter. I used four,you could easily use more or less. Another hint is to use parchment paper to cut down on sticking. I sprayed it with cooking spray and it helped minimize clean up.
4 small zucchini
3/4 cup bread crumbs
3/4 cup grated Parmesan cheese plus extra for topping
1 tablespoon dried basil
1/2 teaspoon garlic powder - do not use garlic salt
1/2 teaspoon pepper
2 tablespoons olive oil
cooking spray
Preheat oven to 450 degrees and prepare two large sheet pans with parchment paper sprayed with cooking spray. Slice zucchini into 1/4 inch rounds and place them in a bowl. Pour olive oil over zucchini and mix with your hands and make sure they are all coated with oil. In another bowl combine bread crumbs cheese and seasonings. Coat zucchini and press crumbs into them. Lay on the sheet pan and sprinkle them with extra Parmesan cheese. Bake for 25 to 30 minutes until golden brown and crisp on top. Enjoy!
Feel free to share with friends and don't forget to leave questions and comments in the comment section below the post.
Happy Cooking!
Carol
a.k.a.
Nonnie
Saturday, September 26, 2015
Peach Cobbler

Last week my granddaughter and I went apple and peach picking. Today, I discovered that there were still quite a few peaches left in the fridge, and they were about to go bad, so I decided to make peach cobbler for dessert tonight. I usually use Bisquick to make a cobbler, but tonight I tried a recipe using flour, sugar and butter to make the topping. This was a big success!
Here is a hint for peeling your peaches. Dip each peach into boiling water for a minute or so and they will peel easily. I changed the filling recipe quite a bit by adding more ingredients to build the flavor.
I actually peeled and sliced the peaches earlier in the day and made the cobbler later. The peeling and slicing was the most time consuming part. I served this with a scoop of vanilla bean ice cream and it was perfect!
Here is the recipe.
For the filling:
8 large peaches - peeled and sliced - about 10 cups
1/4 cup white sugar
1/4 cup brown sugar
2 teaspoons vanilla
1 teaspoon cinnamon
1/8 teaspoon nutmeg (I use whole nutmeg and grate it on a micro-plane grater, but already ground is fine.)
2 teaspoons cornstarch
juice of half a lemon
Preheat oven to 425 degrees. Butter a two to three cup ovenproof casserole. Combine sugars, cornstarch and spices and pour over peaches. Add lemon juice. Mix to combine all. Pour into the casserole and bake for ten minutes.
While the peaches are in the oven, prepare the topping.
1 cup flour
1/4 cup white sugar
1/4 cup brown sugar
1 teaspoon baking powder
1/2 teaspoon salt
6 tablespoons very cold butter, cut into small pieces
1/4 cup boiling water
Mix dry ingredients together. I used the food processor and pulsed the dry ingredients a few times. Add the butter. Use the food processor, or a pastry blender and mix until the mixture resembles coarse meal. Add the water and mix until combined. Mixture will resemble soft dough.
Take the peaches out of the oven and drop spoonfuls of dough mixture on top. You will probably not cover the whole surface, but don't worry about this, it will spread in the oven. Sprinkle a mixture of 3 tablespoons white sugar mixed with one teaspoon cinnamon over the top of the dough. Return to the oven and bake for 25 to 30 minutes, or until the topping is golden and peaches are bubbling. Spoon into bowls and top with vanilla ice cream, heavy cream or whipped cream. Enjoy!
Please let me know if you made this and how it turned out. I welcome your questions and comments, just use the "comments" section at the bottom of this post! Also please feel free to share this post or any other with your friends. The more the merrier!
Happy Cooking!
Carol
a.k.a.
Nonnie
Friday, September 11, 2015
How about Hummus?
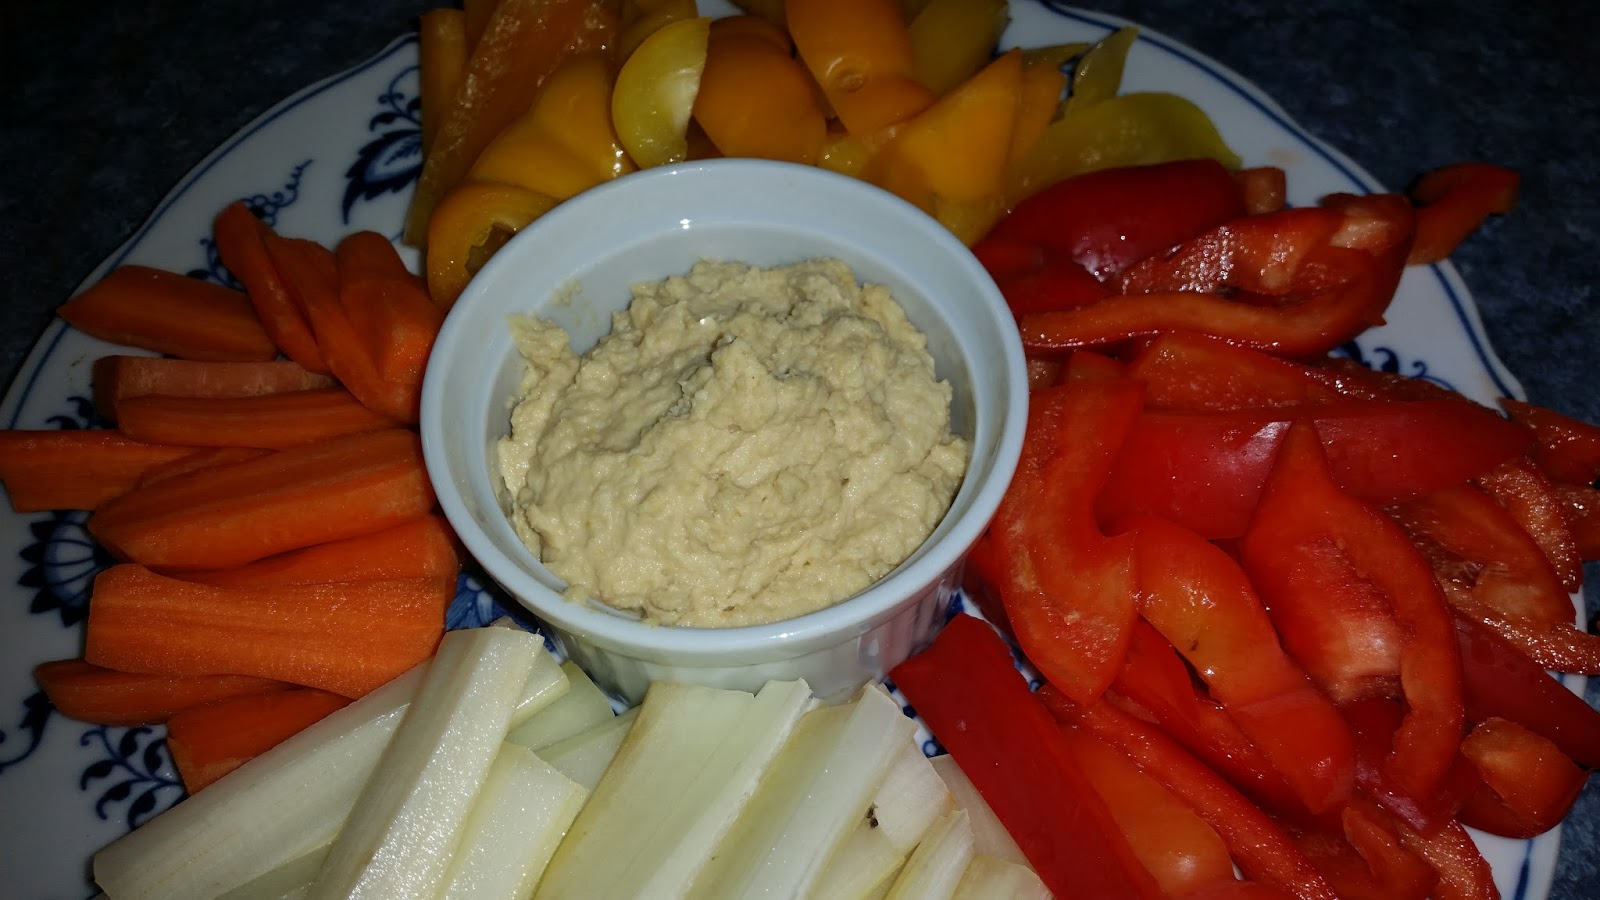
Hummus with fresh veggies
While I did say it's cheaper to make your own hummus, you have to factor in the price of sesame tahini. Tahini is a paste kind of like peanut butter made from sesame seeds. It's a little pricey, but you only use a quarter cup, so a jar lasts quite a while. The cheapest way to make this is to buy the beans dried and soak and cook them, but that is just too much trouble for the few pennies you save. You can usually find chick peas (also called garbanzos) for less than a dollar a can. Look in the Spanish food section, since they are usually a little cheaper there. The hardest part of this recipe is peeling and slicing the garlic. I used to throw in the cloves whole and chop them with the chick peas, but this recipe has you slice and simmer the garlic in olive oil. What a difference! Raw garlic can have kind of a bite, simmering it just until it softens gives you a milder, gentler garlic flavor. I do recommend using a food processor for this, because in a blender you have to blend the chick peas in small batches.
There are debates as to whether you should remove the thin skin from the chickpeas. Don't waste your time! One of my favorite most reliable sources tried it both ways and said there is no difference in taste as long as they are well blended. We want to make this easy not painful!!
When you serve this, it's best to take it out of the fridge and let it come to room temperature. You can also add a little drizzle of olive oil to the top along with some parsley and paprika. Okay here we go!
2 cans of chickpeas
1/2 cup olive oil
1/4 cup sesame tahini
juice of 1 lemon
6 large garlic cloves peeled and thinly sliced
1 teaspoon salt
Drain the beans, but reserve about 1 cup of the liquid. Pour olive oil into a small pan, add the garlic and heat over medium heat. Keep a close watch on the garlic! You only want to soften it, not brown it. Browned garlic is bitter and yucky. Add the chickpeas, tahini, salt, and lemon juice to the food processor and blend; the mixture will be VERY thick. Remove the garlic from the oil using a slotted spoon, add to the food processor and continue to blend. While the food processor is running, add the oil from the pan in a slow stream. If the mixture still seems thick to you, add some of the reserved liquid a little at a time until you reach a desired consistency. Taste and check for seasoning, sometimes if my lemons are a little small, I may add more lemon juice, but that is just personal preference. You can adapt this recipe by adding things like roasted red peppers from a jar, but just add a little at a time as you are mixing the chickpeas and taste as you go. Enjoy!
Happy Cooking,
Carol
a.k.a. Nonnie
Tuesday, August 25, 2015
Everyone's Favorite Granola

Granola and vanilla yogurt - my favorite breakfast!
This is so good that friends tell me I should sell it! I haven't made this in a while, and I was just caving yogurt and granola so I decided to give it a go. The thing I love most about this recipe is that it's all natural. No additives. Check store bought granola and see what's in it. This is really easy. Just assemble your ingredients, mix a few things together, and pop it in the oven. Here are some hints. Place parchment in your baking pans, clean up will be soooooo much easier! Keep an eye on this while it's in the oven. I check it every 15 minutes and give it a stir to keep the color even. When you take it out of the oven, it will seem a little "gooey", but as soon as it cools it crisps up. Let it cool completely before you transfer it to a storage container so it doesn't stick together.

I will give you a basic recipe, but add and subtract what you like. The original recipe called for raisins, I use Craisins because I like them better. It also called for one cup of cashews, but I don't use them. You could add any other kind of nut you like, or none if you have allergies. The original recipe calls for brown sugar. I used to make it with brown sugar, but have now substituted coconut sugar. If you don't want to spend extra, use brown sugar; it tastes just as good. I also always use coconut oil, but you can substitute any healthy vegetable oil. I have also added finely chopped dried apricots, other dried fruit, or sunflower seeds. It pretty much depends what I have in the house.
3 cups old fashioned rolled oats
1 cup slivered almonds
1 cup shredded coconut, I use the sweetened
1/4 cup plus 2 tablespoons honey (you can substitute REAL maple syrup)
1/4 cup plus 2 tablespoons brown sugar or coconut sugar
1/4 cup coconut or vegetable oil
3/4 teaspoon salt
1 cup raisins or Craisins

 Mix oats, coconut and almonds together in a large bowl. If you are adding cashews or other nuts and them to the bowl also. Mix oil, honey and salt in a small bowl. Pour over oat mixture and stir well to make sure the liquid is incorporated into all the oats. Spread on two pans prepared with parchment. I use rimmed cookie sheets. Bake at 250 degrees for 1 hour and 15 minutes. Check and stir every 15 minutes. and when half the cooking time is over, switch the pans on the racks. Let cool completely. Mix in Craisins, sunflower seeds or any other ingredients. Transfer to tightly covered storage container. I like these giant, 2 liter mason jars, but any container with a tight fitting lid will do. Enjoy!
As always, I welcome questions or comments. Feel free to comment in the comment section below this post.
Happy Cooking!
Carol
a.k.a. Nonnie
Tuesday, July 28, 2015
Zucchini Potato Pancakes
Here's another zucchini recipe. The squash borers have attacked my zucchini, so I won't have many more. I wish I could find a way to prevent this from happening, but alas, even my master gardener friends don't have an answer.
So for the past few weeks, I have been using zucchini nearly every day. This recipe was a favorite of my family, so I'm sharing it with you. Now you will see that there is a lot of grating going on here. Grated zucchini will keep for several days in the fridge, if you want to do it ahead, but don't do the potato ahead because it will turn black. I use the grater blade on my food processor and this whole process takes minutes.
1 - 2 zucchini grated
1 large potato grated
1 small onion grated
1 egg, beaten
1 cup flour
1 teaspoon baking powder
3 tablespoons fresh parsley chopped, or 1 tablespoon dried
1/2 to 1 cup grated parmesan cheese
salt and pepper 1/2 teaspoon each
vegetable oil for frying
Combine all ingredients and mix well. Heat oil in a skillet over medium high heat. Drop by spoonfuls into the hot oil and cook about 2 minutes, flip over and cook another minute or so. Serve as a side dish with dinner. I originally made these without the cheese, so that is an option, or you could substitute finely grated cheddar. You can also add grated yellow crookneck squash to the mixture. For a less fattening version, drop onto a lightly oiled hot griddle.
Let me know how you like these. Please feel free to leave comments or questions in the comments section below this post and I will get back to you as soon as possible.
Happy Cooking!
Carol
a.k.a. Nonnie
So for the past few weeks, I have been using zucchini nearly every day. This recipe was a favorite of my family, so I'm sharing it with you. Now you will see that there is a lot of grating going on here. Grated zucchini will keep for several days in the fridge, if you want to do it ahead, but don't do the potato ahead because it will turn black. I use the grater blade on my food processor and this whole process takes minutes.
1 - 2 zucchini grated
1 large potato grated
1 small onion grated
1 egg, beaten
1 cup flour
1 teaspoon baking powder
3 tablespoons fresh parsley chopped, or 1 tablespoon dried
1/2 to 1 cup grated parmesan cheese
salt and pepper 1/2 teaspoon each
vegetable oil for frying
Combine all ingredients and mix well. Heat oil in a skillet over medium high heat. Drop by spoonfuls into the hot oil and cook about 2 minutes, flip over and cook another minute or so. Serve as a side dish with dinner. I originally made these without the cheese, so that is an option, or you could substitute finely grated cheddar. You can also add grated yellow crookneck squash to the mixture. For a less fattening version, drop onto a lightly oiled hot griddle.
Let me know how you like these. Please feel free to leave comments or questions in the comments section below this post and I will get back to you as soon as possible.
Happy Cooking!
Carol
a.k.a. Nonnie
Monday, July 27, 2015
A Quick and Healthy Summer Dessert
I had some beautiful white peaches and I wanted to use them before they got too soft. My chef friend made something similar at our last farm to table meeting, so I thought I'd play around with it. Here's what you'll need.
Summer Peach and Blueberry Compote
4 peaches, pitted and sliced
1 to 2 cups blueberries
1 cup plain Greek yogurt
1 tablespoon honey
1/2 teaspoon cinnamon
1 teaspoon vanilla
Combine yogurt, honey, vanilla and cinnamon. Put peaches and blueberries in a bowl. Top with yogurt mixture. Mix and serve. How easy is that? This recipe was kid tested and they loved it!
Happy Cooking!
Carol
a.k.a. Nonnie
Summer Peach and Blueberry Compote
4 peaches, pitted and sliced
1 to 2 cups blueberries
1 cup plain Greek yogurt
1 tablespoon honey
1/2 teaspoon cinnamon
1 teaspoon vanilla
Combine yogurt, honey, vanilla and cinnamon. Put peaches and blueberries in a bowl. Top with yogurt mixture. Mix and serve. How easy is that? This recipe was kid tested and they loved it!
Happy Cooking!
Carol
a.k.a. Nonnie
Subscribe to:
Posts (Atom)